Saturday, August 30, 2014

How to use Jquery’s Datatable plugin with gridview in asp.net webform application

Note:This article is featured as the article of the day at Asp.Net Community.

Introduction:-
In this article you are going to learn how to use Jquery’s datatable  plugin with gridview using asp.net and sql server as a back end database.

Step 1:-Now create two table in sql server and populate it with data as shown below:

    CountryMaster

    StateMaster

Step 2:-Now create one stored procedure to fetch the records from database.
CREATE PROCEDURE [dbo].[SPState]
AS
BEGIN

                select *,(select c.[Country] from [CountryMaster] c where c.[Id] = s.[CountryId]) as [Country] from StateMaster s

END

Step 3:-Now download Jquery datatable plugin from here

Step 4:-Now extract that downloaded zip file and go to media folder which contains required css and .js file to use datatable in your asp.net application.

Step 5:-Now in order to connect our asp.net application with sql server we need connectionString.Therefore in your web.config file include connectionString tag under  configuration tag.
<connectionStrings>
    <add name="conStr" connectionString="Data Source=localhost;Initial Catalog=YoursDbName;Integrated Security=True"/>
  </connectionStrings>

Step 6:- Now let’s create default.aspx page
<head runat="server">
    <title></title>
    <script src="jquery-1.11.1.min.js" type="text/javascript"></script>

    <link href="jquery.dataTables.css" rel="stylesheet" type="text/css" />

    <script src="jquery.dataTables.min.js" type="text/javascript"></script>
    <script type="text/javascript">
        $(document).ready(function() {
            $(".gvv").prepend($("<thead></thead>").append($(this).find("tr:first"))).dataTable({
            "lengthMenu":[[3,5,10,25,-1],[3,5,10,25,"All"]] //value:item pair
        });
    });
    </script>
</head>
<body>
  
    <form id="form1" runat="server">
    <asp:ToolkitScriptManager ID="ToolkitScriptManager1" runat="server">
    </asp:ToolkitScriptManager>
    <asp:UpdatePanel ID="UpdatePanel1" runat="server">
        <ContentTemplate>
            <asp:GridView ID="gvState" runat="server" AllowPaging="True" CssClass="gvv display" AutoGenerateColumns="False">
                   <Columns>
                      <asp:TemplateField HeaderText="SrNo" ItemStyle- HorizontalAlign="Center">
                         <ItemTemplate>
                             <%# Container.DataItemIndex + 1 %>
                         </ItemTemplate>
                         <ItemStyle HorizontalAlign="Center" Width="10%" />
                      </asp:TemplateField>

                      <asp:TemplateField HeaderText="Id" Visible="false">
                         <ItemTemplate>
      <asp:Label ID="lblId" runat="server" Text='<%# Eval("Id") %>'></asp:Label>
                         </ItemTemplate>
                      </asp:TemplateField>
                                           
                     <asp:TemplateField HeaderText="Country" HeaderStyle-HorizontalAlign="Center">
                       <ItemTemplate>
<asp:Label ID="lblCountry" runat="server" Text='<%# Eval("Country") %>'></asp:Label>
                       </ItemTemplate>
                      <ItemStyle HorizontalAlign="Center" Width="35%" />
                     </asp:TemplateField>
                                           
                     <asp:TemplateField HeaderText="State" HeaderStyle-HorizontalAlign="Center">
                         <ItemTemplate>
 <asp:Label ID="lblState" runat="server" Text='<%# Eval("State") %>'></asp:Label>
                          </ItemTemplate>
                          <ItemStyle HorizontalAlign="Center" Width="35%" />
                      </asp:TemplateField>
         </Columns>
         </asp:GridView>
     /ContentTemplate>
   </asp:UpdatePanel>
 </form>
</body>
</html>


Step 7:- Default.aspx.cs
Include three namespace
using System.Data;
using System.Data.SqlClient;
using System.Configuration;

protected void Page_Load(object sender, EventArgs e)
        {
            if (!IsPostBack)
            {
                fillGrid();
            }
        }

        private void fillGrid()
        {
            string conn= 
            ConfigurationManager.ConnectionStrings["conStr"].ConnectionString;
            SqlConnection con = new SqlConnection(conn);
           
            SqlCommand cmd = new SqlCommand("SPState",con);
            cmd.CommandType = CommandType.StoredProcedure;
           
            DataSet ds = new DataSet();

            SqlDataAdapter sda = new SqlDataAdapter(cmd);
            sda.Fill(ds);
            cmd.Dispose();

            gvState.DataSource = ds;
            gvState.DataBind();
        }
Step 8:-View your default.aspx  page in browser and it will almost look like below:-


Step 9:-Start searching what are you waiting for.

For More details on datatable check out below link:
http://datatables.net

Happy Coding!


Saturday, August 23, 2014

How to remove column from an existing table in sql server?

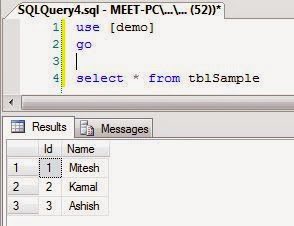
Let's assume we have table with below populated data.


Now to remove column name "Extra" from the above table,use below query(without double quotes)

"alter table tblSample drop column Extra"


Now check the table data after executing above query.


Thursday, August 21, 2014

Could not load file or assembly 'AjaxMin, Version=4.97.4951.28478, Culture=neutral, PublicKeyToken=21ef50ce11b5d80f' or one of its dependencies. The system cannot find the file specified.

The given error indicates that the project bin directory(folder) is missing AjaxMin.dll.So,in order to solve given error follow below steps:

Step 1:-Copy AjaxMin.dll from the ajaxtoolkit extracted folder.

Step 2:- Paste the above copied AjaxMin.dll file to your project bin folder.

Step 3:- Build your project.And you are good to go.

Have a great coding!!!

Saturday, June 28, 2014

How to Upload Multiple Files using HTML 5 in asp.net web form application

Note:This article is featured as the article of the day at Asp.Net Community.

Introduction:
Article discuss about how to upload multiple file in asp.net web form application using html5.

Procedure:
1) Create a new ASP.NET Empty Web Application project as shown below


2) Add new web form and named it Demo.aspx.

3) Now Replace the body of the Demo aspx page with below code

<body>
    <form id="form1" runat="server">
    <div>
 
        <asp:FileUpload ID="FileUpload1" runat="server" AllowMultiple="true" />&nbsp;
        <asp:Button ID="btnUpload" runat="server" OnClick="btnUpload_Click" Text="Upload" />
        <br />
        <br />
        <asp:Label ID="lblOutput" runat="server" ForeColor="#00CC00"></asp:Label>
 
    </div>
    </form>
</body>

4)Now in order to save uploaded images create a folder named "Images" under the root of the project as shown below


5) Now add the following code for the upload button click event
 protected void btnUpload_Click(object sender, EventArgs e)
        {
            if(FileUpload1.HasFiles)
            {
                string path = Server.MapPath("~/Images/");
                foreach(HttpPostedFile file in FileUpload1.PostedFiles)
                {
                    try
                    {
                        file.SaveAs(Path.Combine(path, file.FileName));
                        lblOutput.Text += "File Uploaded is : " + file.FileName+"<br />";
                    }
                    catch(Exception ex){
                        lblOutput.Text="Error happens while uploading your file "+ex.Message;
                        return;
                    }
                }
            }
        }
6) Now build and run the page.


7) Now click show all files in the solution explorer in order to view all uploaded files in Images folder as shown below:-


Have a great Coding.

Wednesday, June 4, 2014

How to integrate ankhsvn to Visual studio

Follow below steps in order to integrate ankhsvn with visual studio

1) Download ankhsvn from here

2) Open visual studio , go to Tools menu,select options


3) In the Source control option in left pane,select Plug-in Selection and in right pane for Current source control plug-in dropdown,select AnkhSVN - subversion support for visual studio


4)Now click on file menu ,select open option and click Subversion project in order to add your repository


5) Now add your repository in the url by clicking add repository url icon


Friday, January 3, 2014

how to replace null values in sql with customize value

ISNULL:-Replaces NULL value with the specified replacement value.

COALESCE:-Returns the first nonnull expression among its arguments.

For e.g.


CASE Statement:-Evaluates a list of conditions and returns one of multiple possible result expressions.

For e.g.


Joins in Sql

Joins in Sql can be classified as below:-

1) Inner Join:-Inner join return all the matching record between two table.
For e.g.

2.1) Left Outer Join:-Left outer join returns all the matching record between 2 table plus non matching record from left table.
For e.g.


2.2) Right Outer Join:-Right outer join returns all the matching record between 2 table plus non matching record from right table.
For e.g.


2.3) Full Join:-Full outer join returns all the matching record from both the table plus non matching record from both the tables.
For e.g.

3) Cross Join:-Cross join produces the Cartesian product of the 2 tables that are involved in the join operation.
For e.g.